I owe this idea to another blogger . . . except I can't actually remember where I saw it. When I rediscover who it was I will pay credit to them here.
Ok ... so the idea is to spunk up the boring white board with some juicy fabric. I know I didn't want a unattractive white board staring at me in my kitchen, study or sewing room so I thought this was just a fabulous idea!
First of all choose yourself some deliciously attractive fabric that you like to look at. Just remember when choosing your fabric that it needs to be a colour that allows your black whiteboard marker to stand out. I purchased half a metre of fabric for my project and it was plenty (depending on the size of your frame of course). You will also need some craft glue, scissors and a couple of books (or something heavy) to weight it down.
I went with a lovely tropical blue and white quilting material - so pretty! Then you need to get yourself a picture frame. This can be absolutely anything of your choice. Any colour or size is suitable. I got mine in a discount store for about $10 and I really liked the white frame.
This project is really so simple . . . so lets get started.
Turn your frame upside down, undo the clasps at the back and take out the backing board. Remove any card inside the frame and discard or keep for another project. You are going to be attaching your fabric to this board. So once you have taken the board out the rest will look like this:
This is the front of your whiteboard.
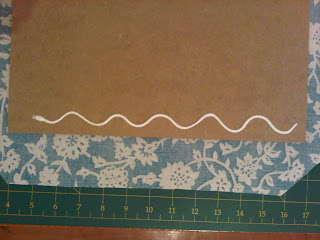
Now that your backing board is removed, place it onto your piece of fabric like so . . .
At this point you may want to trim your fabric down a little so your not folding too much over. So trim your edges and your corners.
Once you have trimmed all your edges start to run some glue along the edge of the board ready for the fabric
I used an all purpose craft glue
do this along one edge at a time then fold your fabric over so its firm. Hold it for a minute with your fingers. You can then place your weights to hold it firm longer. I left each side for a good 20 minutes to make sure it had set enough.
I just used a thick book for this and it worked well.
continue all the way around until your board looks like this. Gluing and tucking your corners. You will need to leave this to dry for a while - I left mine overnight.
Once your glue is completely dry place your board (with fabric on it) back into the frame
press it down into the frame to fit and resecure it. Don't forget to put your little metal hook that it hangs from back in aswell.
Flip over and Your Done!!!
Get yourself some whiteboard markers, a cloth or duster and you have the coolest white board in town.
I just loved this simple little project and I will be making more. It's so versatile and fun!!
I hope you enjoy it as much as I did:)


No comments:
Post a Comment